


Performing daily tree management in house can save money and address problems faster compared to regularly hiring an arborist. Of course, hiring an arborist for regular inspections and more complex tree management makes good sense. But you can take care of the smaller stuff using some basic tools and techniques, and by learning what to watch for. Combined, these efforts will help promote long-term tree health and course safety.
PRUNING TOOLS
Proper pruning techniques must be learned before a blade touches a tree. Illustrations by Edward F. Gilman, Professor, Environmental Horticulture Department, IFAS, University of Florida.
There are a handful of common tree-pruning tools that are good to have on hand to take care of small tasks. These tasks include removing easy-to-access dead wood, clearance pruning over the course, removing damaged branches, and removing vines or other obstructions that prevent you from being able to inspect the tree. The four pruning tools you should have include:
1. Bypass pruners: Great for removing vines from trees or pruning small twigs. Avoid anvil-style pruners that make rough cuts.
2. Bypass loppers: Larger pruners used for trimming branches less than two inches in diameter.
3. Pole pruners: With seven feet or more of extension, these are the perfect tool for hard-to-reach branches. Many include both a pole pruner and saw attachment, which can be extremely helpful for day-to-day tree maintenance.
4. Sharp pruning saws: The ultimate arborist tool, pruning saws have a curved blade and cut in both directions, providing increased cutting power through both live and dead wood. These versatile saws can be used to cut medium-sized branches and can be safer and more effective than chainsaws, not to mention much lighter.
Before you start using these tools to prune your course’s trees, though, it’s crucial to understand how to make proper pruning cuts. Proper cuts give trees the best chance of closing over wounds (see diagram on the next page). Ask your arborist, or check out the University of Florida Landscape Plants website to learn how.
EQUIPMENT MAINTENANCE
Maintaining your equipment will both increase your crew’s efficiency and ensure diseases are not being passed between trees on your property.
It starts with disinfecting your tools. If a drill, saw, or pruner is used on a potentially diseased tree and the tool is not disinfected between uses, the disease or pathogen can be spread to other trees—and even different parts of the same tree!
There are several ways to sanitize your equipment effectively. However, everyone will have their own preferences depending on budget and staff. Below, we discuss a few options we recommend to keep your equipment clean and your trees healthy.
Ideally, equipment should be soaked in a cleaning mixture for 10 minutes to be most effective, but this is not always practical. We recommend soaking tools at the beginning or end of the day, and then sterilizing with spray or liquid and clean rags between uses. Along with your disinfectant of choice, have five-gallon buckets and clean rags on hand as part of your equipment sanitizing toolkit, especially when installing hardware into trees.
Disinfectants
The Best
1. Ethanol and isopropyl alcohol work immediately and do not require soaking or rinsing with water. A small bottle of 70- to 100-percent alcohol, along with a clean rag, will quickly disinfect tools on the fly. Putting the solution in a small spray bottle makes for easy application and reduces spills. These products are flammable, so the containers and rags should be stored properly.
2. Household cleaners such as Lysol, Listerine, and Pine-Sol are moderately safe and minimally corrosive to tools. Lysol in a spray can, for example, helps to reach small grooves on drills and saws when sterilizing tools between trees or cuts. The drawback of household cleaners is that they can be costly, and not much research has been done to prove their effectiveness against plant pathogens.
Not the Best
3. Bleach diluted to a 10-percent solution is also widely used as a disinfectant. To be effective, tools must be soaked for 30 minutes, and rinsed before use. Bleach has its drawbacks, though. It can be corrosive to tools, it can damage clothes, and is dangerous if inhaled. Plus, bleach is phytotoxic, and can cause more damage to plants compared to other disinfectants. We recommend sticking with less toxic disinfectants such as those mentioned above.
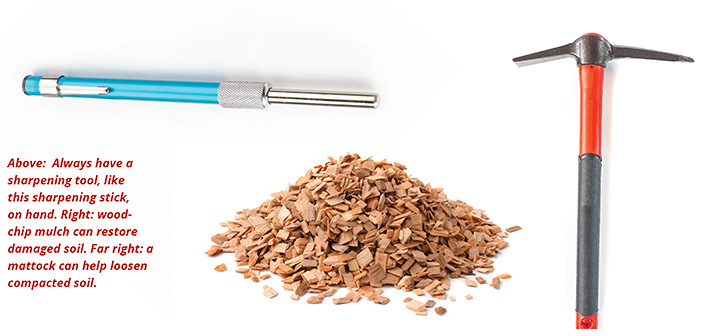
Tool Sharpening
It’s very important to sharpen your tools regularly. A sharp pruner, saw, or drill bit cuts cleaner and easier, reducing unnecessary damage to the tree. Frequent sharpening also improves the lifespan of your tools. A dull drill bit, for example, is more likely to break while in use, causing damage to the tree and damage to your wallet to buy a replacement. We recommend having multiple files on hand so you can easily incorporate this maintenance activity into your regime. Files come in many shapes and sizes, so find the best tools for you based on your equipment.
TREE INSPECTIONS
There are a few simple items that will help your crew with daily inspections to spot and mitigate tree-related issues. It’s important to be aware of the trees, especially after storm events. Conduct a walk-through of the property to identify any potential hazards. Mostly, inspection requires you to use your skills of observation.
1. Binoculars. Trees are big, and often we can’t identify hazards from the ground without the help of binoculars. Crews should use these to do a “scan” from top to bottom of each tree being used in the course, as well as adjacent trees that could target the course. Look for signs of damage—any broken branches that are suspended in the canopy, large cracks or cavities, off-colored foliage, and areas of heavy sap flow.
2. Camera. Photos can help you communicate tree issues to your arborist, and help track tree condition over time. Photos help your arborist give you advice as situations arise, and help your arborist arrive prepared for any work he or she needs to do. If your trees are numbered or the course elements are named, take a photo of the tag before taking a photo of the tree problem. This will help you keep your photos in order.
3. Caution flagging. This is a simple thing to keep around in the event that a potential hazard is identified and requires more detailed assessment or action. Flag off entire areas beneath trees to redirect foot traffic until a certified arborist can inspect the tree in more detail. Use flagging to mark wasp nests throughout your course, too.
TREE PROTECTION & SOILS
Trees are extremely sensitive to ground disturbances, especially around their root systems. When soil is compacted, oxygen, water, and nutrients become less available to trees, which causes them to become stressed. Activities beneath the canopies of trees that may compact soil include heavy foot traffic, materials storage, and operating vehicles or heavy equipment.
The following tools can help prevent and repair compaction.
1. Wood chip mulch, a wheelbarrow and a mulching fork are three main tools you can use to protect soils. Add a 6-inch-thick layer of coarse woodchip mulch over bare soil to improve soil conditions. Wood chips are readily available from production arborist companies, and are generally free or very cheap. Have a mulch pile on site at all times, and be equipped to easily spread it beneath trees and along high-use trails.
2. AlturnaMats or similar lightweight plastic mats protect fragile soils from compaction by vehicles or heavy materials during course construction or maintenance activities. These mats work by spreading pressure over a wider area. Plywood can provide a similar function, but is heavier and more difficult to move, and is less durable.
3. Mattocks can be helpful in de-compacting smaller areas of soil. Be careful not to wound any surface roots while using them, and do not over-till the soil.
PROFESSIONAL TOOLS
Some of the tools that your arborist may use to assess and manage the trees on your course require a larger financial investment and/or knowledge for proper use. We don’t recommend that you try to use them yourself unless you have received training and have experience with them, but it’s useful to know that these exist and what they can do. Some important examples:
1. Increment borers are useful on challenge courses, especially to determine growth rates of trees. This will help decide which types of fittings or attachments should be used, and how much room for growth should be provided.
Arborists use a soil core tool to take soil samples for testing.
2. Soil cores are used to take soil samples so that an arborist can get a better sense of the soil texture, moisture, and organic material content on your site.
3. Soil compaction probes or penetrometers measure the pounds per square inch of soil. This accurately measures the degree of soil compaction.
4. Pneumatic air excavation equipment. These powerful tools are used to decompact soil or install infrastructure without severing roots. These tools require advice from an expert and a skilled operator, as they can damage trees if not used correctly. The most common brands are Air-Spade and Air-Knife.
5. Sonic tomography measures the speed of sound waves traveling through a cross-section of the trunk to determine the density of the wood. This tool helps to identify how much decay versus sound wood may be present.
6. Micro-resistance drills use a very small drill bit to determine the density of wood by measuring the resistance as the needle is driven into the wood. This tool also helps arborists assess the extent of decay in trees.
With these tools, a well-trained staff, and the support of a certified arborist, you’ll be well on your way to a long-lasting and healthy forested landscape.


