Part I of this series showed the tremendous value video adds to any aerial adventure operation’s online presence. This second installment shows how you can go about planning and producing your own videos, and offers some suggestions for the tools you’ll need to successfully do so. By the end, you’ll have all the pieces you need to start harnessing the power of video.
To refresh your memory, in Part I we outlined several types of videos you might want to create and publish. For example:
Explainer videos. Inspired by your FAQs, these uncomplicated videos are generally about how to enjoy a day at your park—what to wear, what to expect during a visit, etc.
About-us videos tell background stories about the park, the people, and the experience.
Action videos. These provide a ride-along experience for viewers on each feature of the park.
Testimonial videos. Interviews with customers serve as reviews as well as revealing your park’s features.
For any type of marketing video, Fotaflo president Ryan O’Grady offers some simple guidelines. “Videos should be impactful, short, viewable, embedded with a brand, and create a measurable benefit to the business,” says O’Grady. “You need to have intent for that video.”
You know video is powerful, and you’ve brainstormed ideas. Now, let’s go through the process to create a video that’s perfect for what your park wants to accomplish.
SQUAD GOALS
Before we venture out with cameras and microphones, there are a few steps to complete. First, let’s figure out your goals. Ask yourself a few key questions:
• What answer do I provide over and over to guests that could be provided in a video?
• What communication gaps do I consistently experience and need a new way to resolve?
• What is the most successful aspect of my park that deserves additional spotlight?
These aren’t the only questions that can help you figure out the goals for your next video. Marcia Herteis, VP of sales at PicThrive, suggests it’s important to “understand who your target audience is,” too. The point is: Don’t make a video just because you can. Make a video because you should.
For our purposes here, let’s select a theme for a video that can accomplish more than one goal: “A Day at Our Park!” This has all the fixings for a phenomenal outcome: a testimonial-type message, an explainer of all that goes into your park’s experience, and an overall show-and-tell of what your park offers.
STORYBOARD, NOT A BORED STORY
The next step is crucial, yet often overlooked: storyboarding the video.
The word “storyboard” can be intimidating, mostly because it sounds like something only movie studios and ad agencies do. In reality, all you need is a three-column table like this one, below:
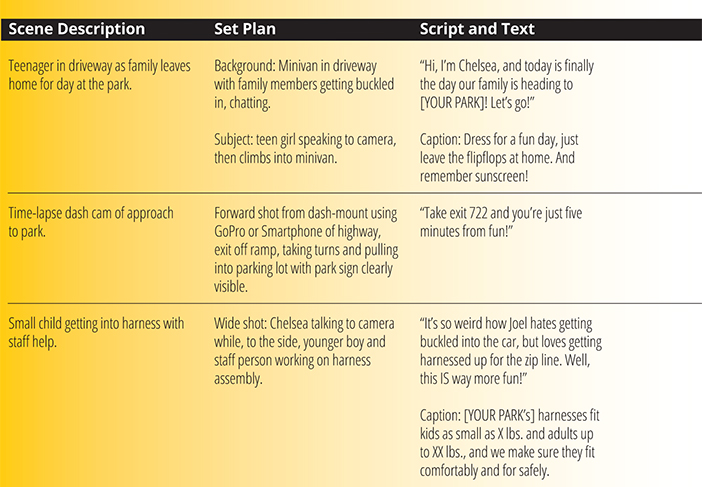
As you add each row and fill in the detail, the video structure begins to take shape in your imagination. You can also easily move scenes around to ensure the flow makes sense. Ask for opinions from your team to make sure the flow looks good on paper—because then it’s more likely to look good on video.
Your storyboard can also include additional columns for planning transitions, music, effects, and so on. It all depends on how detailed your imagination can get. In general, though: “Build your brand and personality into the video,” says Herteis. “Capture the quirks and highlights of your [tour or park].”
PLAN THE VIDEO PROJECT
Once your storyboard is fleshed out, start planning your video shoot. That means people, places, and things.
People: Staff members are your top resource for this aspect of the video, especially if you’ve included them as characters in your storyboard. For authenticity, also include family, friends, and even customers. You can always incentivize them for participating by offering vouchers for a free climb or zip.
Energy is key here: The people in your video need to look like they want to be there, so choose folks who actually enjoy the activity you’re filming—and are also game to be on the big (or little) screen.
Places: Establish where each shot will happen, and when. Some notes to consider as you proceed:
• Permissions: If any shots will take place on property you don’t own, get prior authorization from the owner to shoot video there. A video shoot can draw a surprising amount of attention, so make sure you can prove you’re allowed to be there if someone asks.
• Weather: When shooting outdoors, Mother Nature is essentially one of your cast members. Have back-up times and dates in your plan if she doesn’t cooperate. Rain, wind, and flat light are not good for video shoots.
• “Extras:” If you’re not shooting in an area that’s closed to the public, bystanders may prefer to gawk rather than pretend it’s business as usual. You don’t want them in your shot, so put up notices that a video shoot is under way, and have one or two people present to wave people through or direct them around the action.
Things: Whether it’s a minivan or a harness, make sure you have all props and objects lined up and set aside for your use. Never assume an object that has always been there before is going to be there on the day of your shoot.
Also, make sure your props are clean and look good. This applies to everything and everyone that will be in front of the camera, in fact.
TOOLS OF THE TRADE
At last! We’re just about ready to send out the crew and make a video shoot happen. We have the goals, we have the storyboard, and we have the plan—now we just need the equipment that will capture the magic.
Let’s cover your options for cameras, microphones, lighting, editing, and miscellaneous tools. Most of these are available to purchase from Amazon.com or other online sellers; check https://www.amazon.com/shop/rachelmoore to compare options.
Cameras
Today’s cameras are small, fast, and easy to use. You don’t need to be a seasoned pro or have a movie-studio budget to effectively shoot a top-notch video. The tool options:
Smartphone Stabilizer. It’s perfectly fine to use the very adequate camera on your smartphone. But to ensure the footage looks professional, get a hand-held stabilizer. This tool lets you take a truly steady video using your smartphone, even if you’re in motion. Smove makes a fantastic and easy-to-use Bluetooth stabilizer for smartphones. NOTE: Videos take up a ton of storage on a smartphone, so make sure the device you use has plenty available. (Approx. $140-$250)
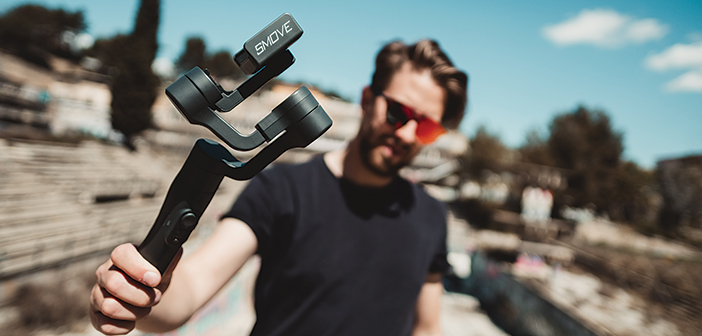
If you’re shooting video from a mobile phone you’ll want to use a stabilizer, like this easy-to-use one from Smove.
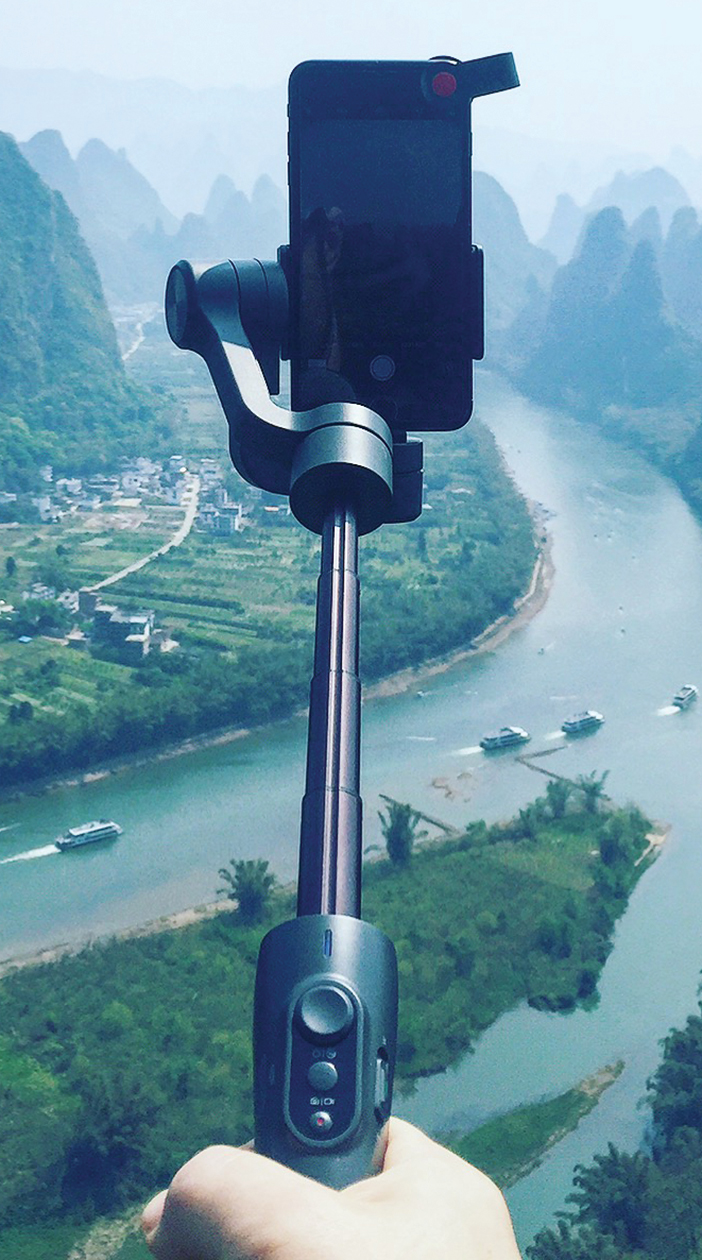
Using Smove to capture the action.
Mobile Camera. The DJI Osmo Pocket is compact, easy to use, and has a native stabilizer. It shoots HD-4K video, and can also capture photos, time lapse, and slow motion. There is even an easy editing feature in the accompanying free mobile app, plus motion tracking for action shots. For storage, it uses an SD card, which needs to be purchased separately. (Starts at $399)
DSLR (Digital Single Lens Reflex). This is the type of professional photo camera most of us are used to seeing. Nowadays, these take really great video as well. DSLRs are the most common type of high-end camera used by pro photographers and non-studio videographers. They are a bit more complex as far as features and how to use them beyond a simple point-and-shoot, so the learning curve is steeper than for a smartphone or mobile camera. (Approx. $350 and up)

A DSLR (Digital Single Lens Reflex) professional photo camera can take really great video as well.
Drone. If you really want to add dimension to your video with the power of flight, investing in a drone—or utilizing a company like Revl, which uses DJI drones—can be a great option. The footage provides a cinematic aspect that is harder to achieve when you’re bound to the ground. However, there are rules and even laws around drone use, so know before you buy and fly. (Approx. $800+)
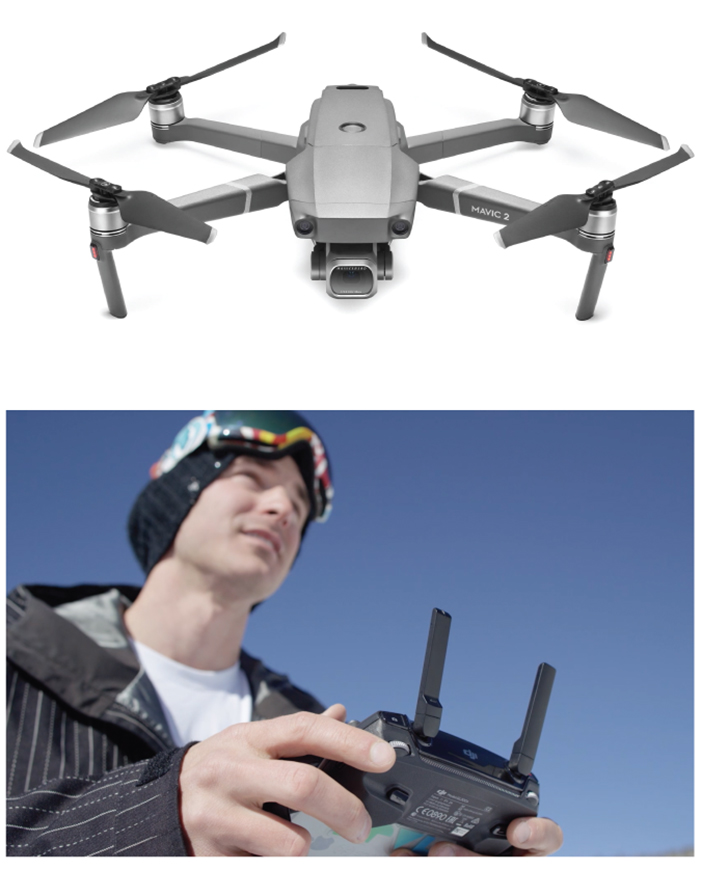
Revl uses DJI drones to get high quality cinematic video from above, while controlling from below.
Microphones
You must-must-must use microphones in your video shoots. A video consumer will often forgive subpar video as long as the audio is clear. But if you’re investing in a high-quality video, poor or unclear audio will lose any points you would have gained.
It’s incredibly affordable today to make good audio happen. Here are a few suggestions:
Mobile lavalier microphone. A simple lavalier (lav) mic is affordable and easy. It consists of a clip-on mic, a really long cord, and an eighth-inch audio input that works with your smartphone or any standard audio input. They even come with windscreens and pop filters to reduce ambient noise. (Approx. $20)
Wireless lavalier microphone system. To lose the cords and wires in favor of action and mobility, you can invest in a two-piece wireless lav mic system: a clip-on lav mic that runs to a belt-clip pack, which sends the audio wirelessly to a receiver pack that clips to a DSLR or larger camera. Both packs are battery-powered and can allow your subject to move freely as you capture their audio while shooting the video. (Approx. $600)
Note that there are some Bluetooth-enabled microphones that work with any Bluetooth device, including smartphones. However, in addition to questionable reliability, the use of such devices is being evaluated by the FCC—buyer beware.
Boom microphone. Especially useful if you’re using a DSLR camera, a boom microphone can be affixed to the top of your camera to capture nearby audio. This isn’t the ideal option for distance or outdoor shots, but if you’re indoors in a somewhat controlled environment, it works great. (Approx. $25)
Other Handy Tools
Mounts. Just like stabilizers, camera mounts and tripods can make an amateur video look like the work of a pro simply by steadying the shot. Dashboard camera mounts, floor mounts, tripods, etc., can be found from companies like Arkon (use REALLYSOCIAL at checkout to get 20 percent off).
Internet and Wi-Fi. Draheim from Revl has some great advice for any park: “Make sure your park has the proper infrastructure to handle high volumes of videos, the most important piece being high-speed internet with fast upload speeds.” For editing and uploading your videos as well as allowing your guests to share their own videos online right away, providing the digital highway for your video traffic is crucial.
